Overview
Mapbox is a well-known service for maps and location and it provides its SDKs for multiple platforms from the web to the mobile. Within the mobile, there are SDKs for Android, iOS, ReactNative and Flutter, but none for Xamarin/.NET Android.
Recently, I successfully created and published the NuGet package for integrating Mapbox Android SDKs to your Xamarin.Android and/or .NET Android app.
dotnet add package Com.Mapbox.Maps.Android --version 11.4.1
In this blog, I will guide you through the steps to use that mentioned NuGet package in a .NET Android app.
TLTR; You can access the full quickstart example from this GitHub repo.
Prerequisites
Visual Studio for Mac or Visual Studio on Windows
.NET 8.0.100
.NET for Android workload
Steps
Assumption: You already have a .NET Android app. If not, you can just create a new empty .NET Android app to follow this guide.
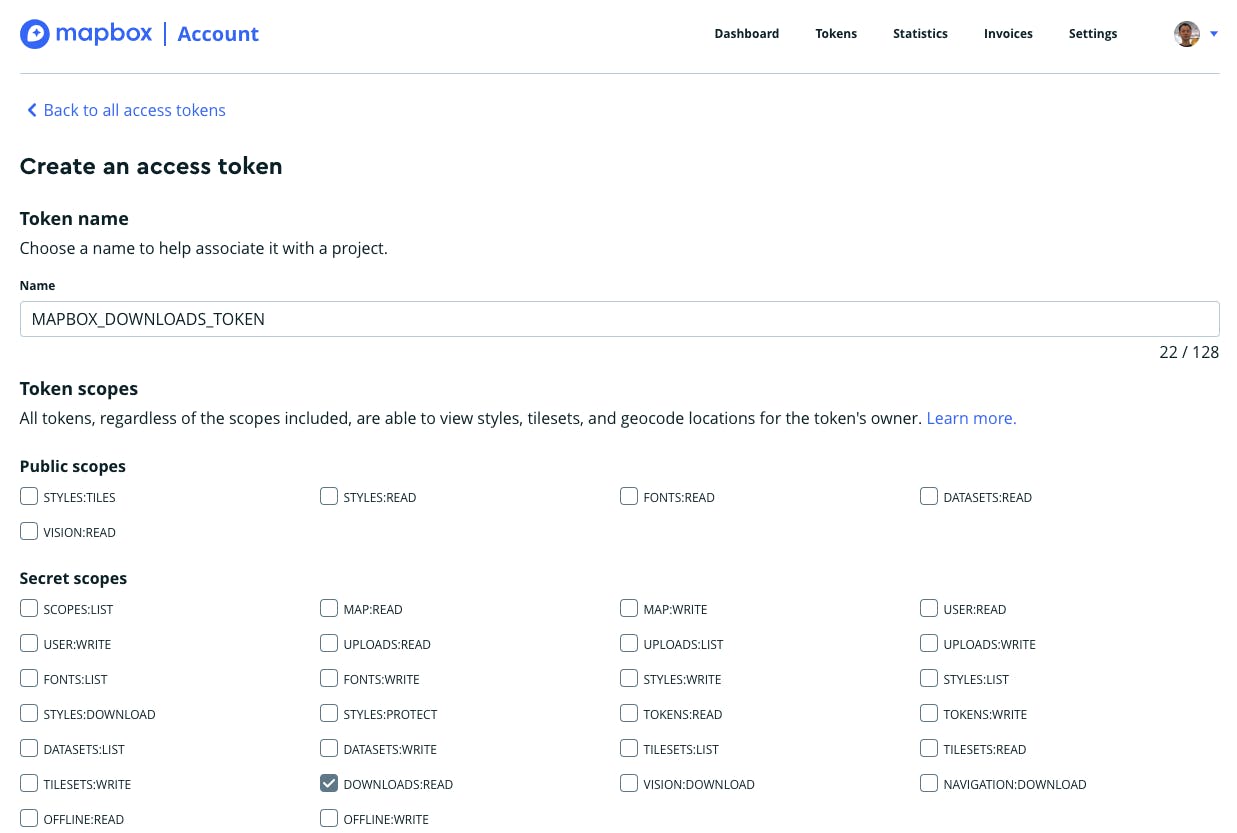
1/ Config your MAPBOX_DOWNLOADS_TOKEN
Mapbox Android SDK is distributed privately via Mapbox's dedicated Maven repository which requires a personalized MAPBOX_DOWNLOADS_TOKEN to get the Gradle build to download the required artifacts.
FYI: Mapbox Android SDK for .NET makes use of Gradle to download its native dependencies.
- Grab your MAPBOX_DOWNLOADS_TOKEN from your Mapbox account page

- Put that token
~/.gradle/gradle.propertiesfrom the terminal
echo "MAPBOX_DOWNLOADS_TOKEN=YOUR_MAPBOX_DOWNLOADS_TOKEN" >> ~/.gradle/gradle.properties
You can follow the official guide from Mapbox to complete this step.
2/ Add Mapbox Android SDK for .NET to your project
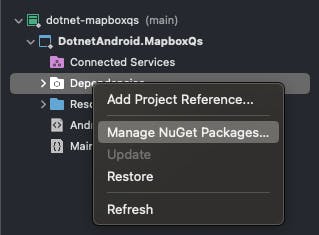
Open NuGet Package Manager

Search for the package
Com.Mapbox.Maps.Android
Add it to your project

NOTE: If you failed to add the nuget package, please check
Package Consoleoutput window and resolve all mismatching dependencies. (I expect VS can do it for us, but it cannot)
- Add these other required packages as well to resolve incompatibility issues
<PackageReference Include="Xamarin.AndroidX.AppCompat" Version="1.6.1.10" />
<PackageReference Include="Xamarin.AndroidX.Fragment " Version="1.7.0.2" />
<PackageReference Include="Xamarin.AndroidX.Fragment.Ktx" Version="1.7.0.2" />
- Check the result

3/ Add Mapbox maven repository to .csproj
As I mentioned earlier, we will leverage Gradle, an Android build system, to resolve and download all Mapbox SDK's artifacts for us. To make that happen, we will need to amend our Android .csproj file.
Open
.csprojfile in VS or VSCodeAdd these lines
<ItemGroup> <GradleRepository Include="https://api.mapbox.com/downloads/v2/releases/maven"> <Repository> maven { url = uri("https://api.mapbox.com/downloads/v2/releases/maven") authentication { create<BasicAuthentication>("basic") } credentials { // Do not change the username below. // This should always be `mapbox` (not your username). username = "mapbox" // Use the secret token you stored in gradle.properties as the password password = providers.gradleProperty("MAPBOX_DOWNLOADS_TOKEN").get() } } </Repository> </GradleRepository> </ItemGroup>Try to build the project
A successful build means you did it well by far
4/ Configure mapbox_access_token
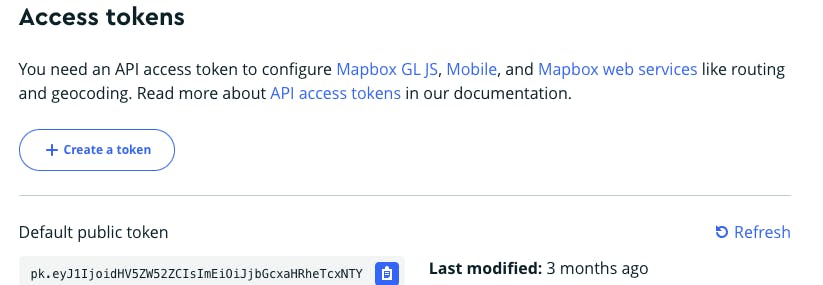
To work with Mapbox APIs, we have to generate a personalized access token from our Mapbox account page and then put it into our project to use
Generate/grab the access token

You can use the default public token for this tutorial. If you want more control over what scopes to be used, please create a new token
Copy the generated access token to
Resources/values/strings.xml<resources> <string name="mapbox_access_token">YOUR_MAPBOX_ACCESS_TOKEN</string> </resources>NOTE:
mapbox_access_tokenis a sensitive data item, it shouldn't be committed to our git repository. We should put it in an ignored file, but still understandable by the compiler.
5/ Add MapView control to your app
- In XML
Resources/layout/activity_main.xml
<com.mapbox.maps.MapView
    xmlns:android="http://schemas.android.com/apk/res/android"
    android:id="@+id/mapView"
    android:layout_width="match_parent"
    android:layout_height="match_parent" />
- Ensure your activity inherits from AppCompatActivity and use an AppCompat theme
[Activity(
    Label = "@string/app_name",
    MainLauncher = true,
    Theme = "@style/Theme.AppCompat.Light.DarkActionBar")]
public class MainActivity : AppCompatActivity
{
    // ...
}
- Access
mapViewinstance from C#
[Activity(
    Label = "@string/app_name",
    MainLauncher = true,
    Theme = "@style/Theme.AppCompat.Light.DarkActionBar")]
public class MainActivity : AppCompatActivity
{
    MapView mapView;
    protected override void OnCreate(Bundle? savedInstanceState)
    {
        base.OnCreate(savedInstanceState);
        SetContentView(Resource.Layout.activity_main);
        mapView = FindViewById<MapView>(Resource.Id.mapView);
    }
}
- Override life-cycle methods
    // ...
    protected override void OnStart()
    {
        base.OnStart();
        mapView?.OnStart();
    }

    protected override void OnStop()
    {
        base.OnStop();
        mapView?.OnStop();
    }

    public override void OnLowMemory()
    {
        base.OnLowMemory();
        mapView?.OnLowMemory();
    }

    protected override void OnDestroy()
    {
        base.OnDestroy();
        mapView?.OnDestroy();
    }
    // ...
- Check out the result

NOTE: You can also initialize MapView instance directly from C# exactly in the same way you find in Mapbox native examples.
Wrap up
I just guided you on how to use Mapbox in a .NET Android project. You can do the same steps for a Xamarin.Android project.
I want to port all native examples to .NET Android, but it'll be a time-consuming task. Single me will last for a very long time. I hope the community can contribute to this GitHub repo and/or to their repos.
